
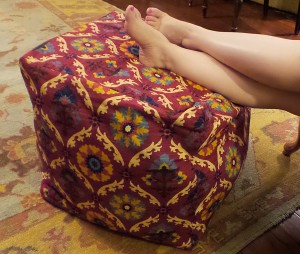
Have you been admiring the fabric and leather poufs that can be seen in magazines, catalogs and on TV? I sure have, but I am not going to spend $250 or more. So, I decided to make my own.
The pouf I made is for my vacation rental cabin in Beaver’s Bend, OK named My Ok-La-Home. Because of this, I have worked hard to have a very durable construction. You won’t believe what people break at these cabins!
What I used:
- Decorator fabric that I found on sale for $20. My pouf is 21” by 21” with a 1” seam allowance.
- Cheap, but sturdy muslin fabric for the internal bladder.
- Old towels for stuffing.
- 2 foam cushions for stuffing. I found them on Amazon.com. I believe I paid about $20 for the two.
- Pillow batting for stuffing.
- Quilt batting for lining decorator fabric.
- Sewing machine. However, if you are making one for your personal use, you might be able to make it work with just hand sewing.
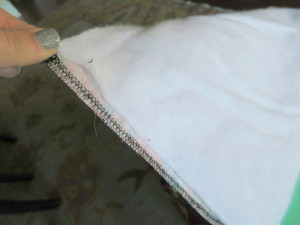
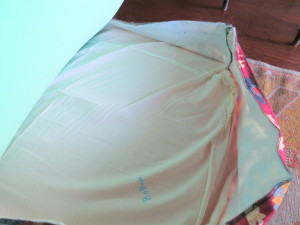
Decide how big you want your pouf. My pouf is for sitting and for putting your feet on, so I decided on a big version. I first made the inner bladder, the same size as my finished product. With 6 squares all the same size, I sewed 4 squares together on the sides, making a chain. Then I added one square to the bottom of an edge of one of the squares in the chain of 4. I then added one to the bottom. Then I sewed all other sides, making cube, but leaving one square only sewn on by one side. I then stuffed the cube with old worn out towels, then I added some batting in the middle and then a few more towels. It needs to be full, but not too heavy to pick up and move around. On the internal bladder, I did not worry about the seams facing inward. I left them exposed, because no one will see them. Lastly, I hand stitched the cube closed.
Next, I cut my decorator fabric and quilt batting again the size I want the finished product, plus 2 inches (so an extra inch on all 4 sides). I serged the edges of all my decorator fabric, again for durability. The quilt batting could be sewn on, by sewing it all around the sides, within the 1 inch seam allowance. Instead I just sewed mine in with the same stitches I sewed the decorator fabric into the cube. This time, I machine stitched 1/3 of the way down the lid, so that I would not have to hand sew as much, but I could still get the bladder in.
I put a piece of foam in the bottom, then the bladder, then another piece of foam on top. The foam just added a bit to the structure so that it did not look so slouchy. I hand stitched the lid into place, using a stitch that would not show.
I considered adding grommets with rope handles, but that would weaken the fabric and not survive a vacation rental. It might work well in your home. You might also consider adding a piping along the seams, using leftover fabrics from other projects in the room where the pouf will be housed to make it tie in.

I spent $40, used scraps and other items I had around the house to make a beautiful fabric pouf. If I can do it, so can you!