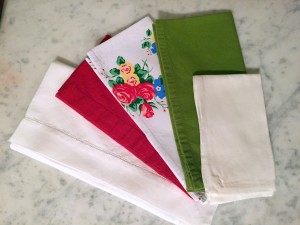
Yes, this is a post about napkins. And, I don’t mean paper napkins (although they do have their time and their place.) We are talking the real deal here…cloth napkins.
First, there are generally accepted appropriate sizes for appropriate occasions. However, as with everything etiquette related, there are exceptions. Such as the size of your table. Normally, the more formal the event, the larger the napkin. But if you are using a small, intimate table, you may not have room for large napkins. Or maybe you are having a barbecue dinner. Big napkins (like maybe a cotton bandanna) might be useful for your guests.
Dinner napkins range from 20 x 20 to 28 x 28
Lunch napkins range from 13 x 13 to 18 x 18
Tea napkins 11 x 11 to 12 x 12
Cocktail napkins 9 x 9 to 11 x 11
Some napkins are rectangle. What looks correct with your place setting may be a better guide than an arbitrary napkin size requirement (unless you have the Queen coming to your dinner party).
Second, choose your fabric wisely. I love beautifully starched linen napkins, but honestly, I rarely set my table with them. They are difficult to get stains out of, they are time consuming to iron, and I may be one of the few people who actually appreciate them! For everyday, I like to make or buy soft, all cotton napkins. I like to get patterns, because they help to hide the stains.
I would advise you to stick to all natural fibers and steer clear of polyester or water repellent napkins (isn’t it is odd they even make those?).
Third, you may reuse cloth napkins during the course of a day, if they are not too soiled. I would not advise this if you have house guests. For example, if it is just your family eating at home and everyone has a seat they always sit in, it is perfectly okay to refold each person’s napkin from lunch and leave it out for dinner…assuming they are lightly used. A lunch of ribs with barbecue sauce will probably necessitate a new dinner napkin.
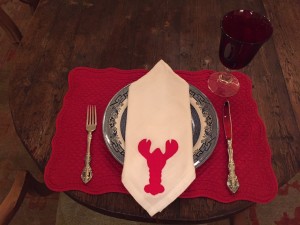
For my final takeaway, I want to share with you my easy breezy napkins. A year or so ago, I was hosting a seafood party, so I did not want to get butter on my nice linen napkins. I wanted to go with my seafood theme, but I did not want to break the bank. So, I came up with these fast and fun napkins.
You will need:
A bundle (or more, depending on how many napkins you are making) of flour sack towels.
Sewing machine with white thread
Gridded cutting board and rotary cutter (you don’t have to have either, but it is so much faster)
Iron and ironing board
Optional, accent fabric, matching thread, and a pattern for your design (I use cookie cutter outlines a lot)
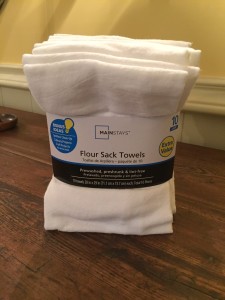
Begin by cutting the 25 x 28 down so that you end up with a 21 x 21 square dinner napkin (of course you can make them smaller as your occasion dictates). To do this, put the corner of flour sack towel in the corner of the grid cutting board. Cut the top and one side to make 22 x 22 (with the seams, it will turn out to be 21 x 21). If you want a 25 x 25, just cut one short side to 26 inches. ** If your towel has 2 sewn sides and 2 selvage sides, you will want to sew a hem on one of the selvage sides (I use 1/2 inch, turned under twice.)
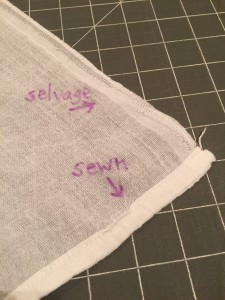
On the cut sides, turn the raw edge under by one half inch and press. Then turn it under one more time and press. Then put in a few pins to hold it. This double fold will hide any raw edges. Make sure your turned under seams are on the same side as the pre-existing turned under seams.
Sew one edge, then the other. This fabric is so thin, that I don’t worry about mitering my corners. The corners of my flour sack towels were not mitered, so it works.
After sewing up the two sides, you have a great dinner napkin that is cheap enough you don’t mind sacrificing it to the lipstick, barbecue, and mustard stains of the world.
If you really want to doll up your napkins, you can add a design element. It could be as simple as adding an accent stitch in a bold color all the way around the napkin’s edge. You could embroider your initials on all. Even funner might be to use the napkin as a place card and embroider each guest’s initials on a napkin. Or you may want to appliqué or embroider a design on them.
For the seafood party, I purchased a lobster cookie cutter that I used as a pattern. I was making 10 napkins, so I cut out 10 lobsters from red fabric. If your cookie cutter is too small or big, you can adjust it using a copy machine. Just draw around the outside of the cutter, then enlarge or reduce the outline.
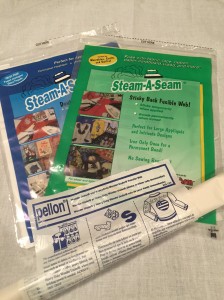
Next, I used Wonder Under (or anything that will stick two pieces of fabric together without getting stiff). I cut out 10 lobsters, just a hair smaller than my red fabric lobsters.
Remove the paper backing and stick the Wonder Under onto one side of the red fabric lobsters. Then place the red fabric lobster, Wonder Under side down, on the corner of the white napkin. I like to do this at an angle because they look nice when folded and the corner shows. Iron the lobster onto the napkin (the Wonder Under is between the napkin and the design – when melted they stick together – read the package directions to see how to use your product).
Using a coordinating thread (in my case I used red), zig zag stitch the design onto the napkin (I use stitch width 2.5 and stitch length .75). Ta-da! You have a cute, fun, inexpensive napkin that will liven up your table setting.
I also made some napkins for my vacation rental house, My Ok-La-Home. For these, I used a tree design and then embroidered “My Ok-La-Home” underneath.
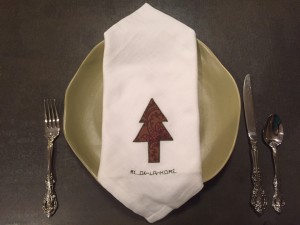
Folks, these make great hostess gifts! Stitch up some napkins that will go with your host and hostess’s decoration. Maybe embroider their first names on two and leave the rest blank. Or maybe embroider a favorite saying or their street address. The ideas are limitless.
Bonus: Do you know the proper way to fold your napkins? Napkins are to be placed to the left of the forks (which are to the left of the plate). Fold you napkin in half. Now fold the long side in half again (you should have a square, if you started with a square napkin). Now, with the folded point of the napkin in the top left and the four open points of the napkin in the bottom right, fold the right edges to the left. You are left with a rectangle. The folded side is on the right, and should be next to a fork. This makes the napkin easy to unfold and put across your lap.
Please note, I broke the rules with the napkins I displayed above! But, the napkins looked better this way. Sometimes creativity and the right look might have to outweigh etiquette rules. Hopefully no one gets hurt in the process!
Update: If you are looking for the flour sack towels, I find mine with the kitchen towels at Walmart.
