
I mentioned in an earlier post that when we stay at a vacation rental house, there is always something we like that we take away. At the Key West house, it was the remote control LED lights under the kitchen shelf. The strip could light up in just about any solid color, or they could flash or rotate among the various colors. How fun!
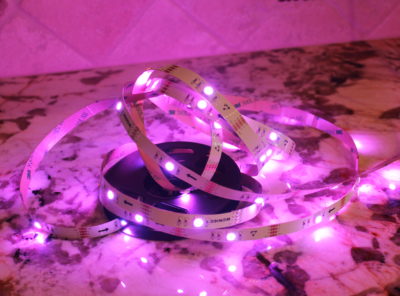
A quick search on the internet and I owned a 9 foot strip that I planned to use under the lip of the wall cabinets in my butler’s pantry. It cost a little under $10. It was so easy to install, and it only took minutes to have them working. The strips can be cut to length and have tape on the back to stick where you want them.
That however was not good enough. My cabinets are in three parts; a low section, a raised section above the sink and then another low section. I decided I needed two more strips, but I wanted them all on one remote.
Back at the internet I determined that they could be connected. I purchased just about every LED strip related accessory sold on Amazon to see if I could figure out how to make it one long string with blank spots in between where the upper cabinet elevation changed.
Surprisingly, I could not find much information as far as how-tos out there. Most of what I found wasn’t exactly my product or made no sense to me. I am going to attempt to provide that information here. I am not a electrician, so this may or may not be useful!
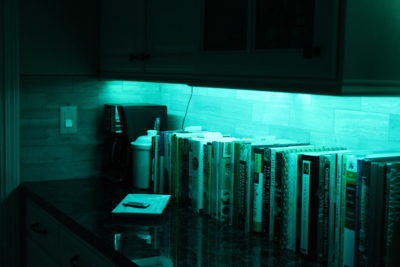
If you are thinking that this is not something you would want in your home, think again! These lights really are useful, and they don’t use much electricity to power them. I put them under a cabinet in my butler’s pantry to use as a party light, but I really like them in the morning. I don’t have to walk to the other end of the pantry to turn on the hardwired under counter lights, and the overhead lighting is too bright. These strip lights are now my go-to lights for the pantry.
We also want these in the living room on top of the credenzas on either side of the fireplace. I want them under the nightstands so that if I get up in the middle of the night, I don’t wake Mike with a bright lamp or overhead lights.
These strips are also available for outdoor use so I will probably add them under the overhang on the back patio. I would think that kids would love them in their rooms, under the bed, behind the headboard, under the nightstand or play table, etc. The uses are endless. You just need a USB port or electrical plug (depending on the type you purchase) to power them.
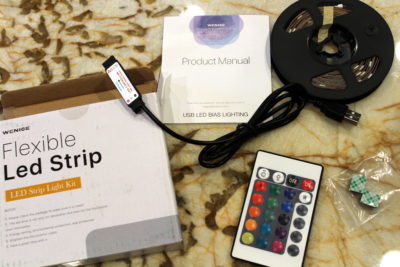
First let’s talk about the exact type of lights you will need. I used the 4 pin LED light strips that can be cut. Your options include:
- Indoor or outdoor. Outdoor has a plastic covering over the top.
- Solid color or changeable. I chose the 4 color strips.
- Powered by USB or plug. My first purchased was a USB, which I put into a converter and plugged into the wall. Mine was actually made to go around the back of a TV and be powered through the TV’s USB port.
- Cuttable/customizable or fixed length.
- Size and power of lights, which are identified by numbers such as 5050, 3528, and 2835. You will want to note how many lumens the strip puts out as well as how many LEDs there are per meter or foot.
Now let’s identify what each item you may need looks like and what it is named.
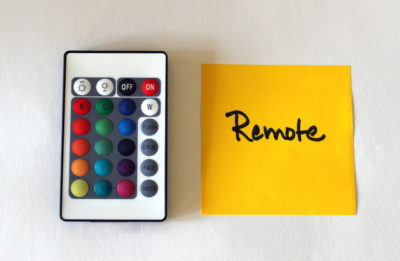
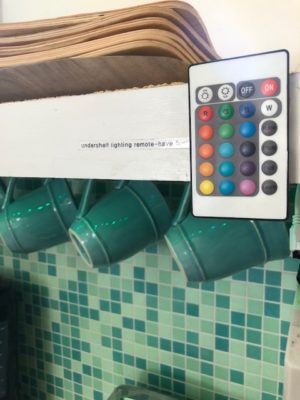
Remotes come in several types. Some allow for more preprogrammed colors or color changes. Some even allow you to program your own patterns of color changes. This one is pretty simple. It allows for an increase or decrease in brightness, 16 preprogrammed colors, and 4 patterns of color changes.
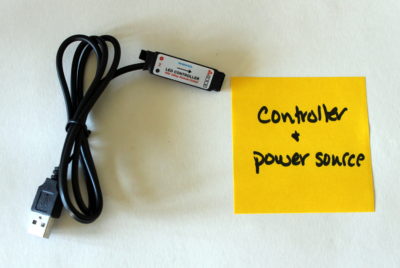
Power source or power adaptor – what plugs into the light strip and the power source. Depending on the type of kit you purchase, there may be a control unit or control center in between the light strip and power source.
The control unit or control center recognizes the remote control signal.
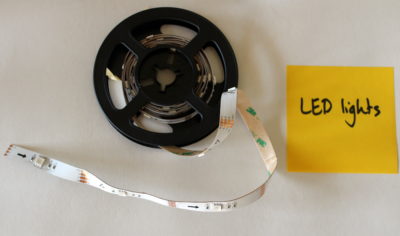
RBG strip lights or LED lights or LED strip lights are the length of lights. RBG stands for red, blue, green.
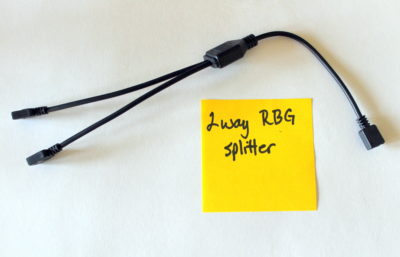
2 way RBG splitter allows you to connect two LED strips to one controller. I would use this under the bed to put lights under light stands on either side of the bed, for example.
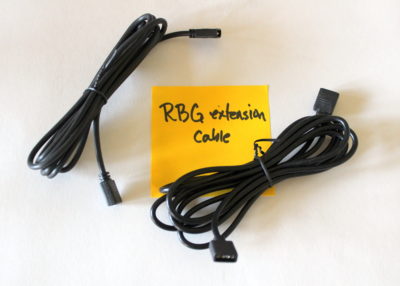

RBG extension cable is used to create a gap in lights.
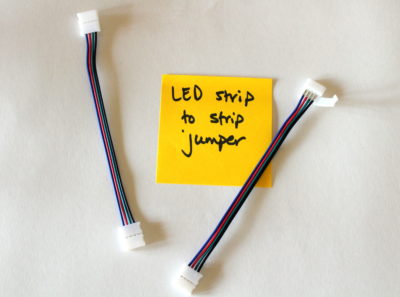
LED strip to strip jumper connects two strips while creating a gap in the lights. Note it has two white ends.

Strip to RBG controller jumper connects a strip and a male 4 pin connector while creating a gap in the lights. Note it has a white end and a black end.
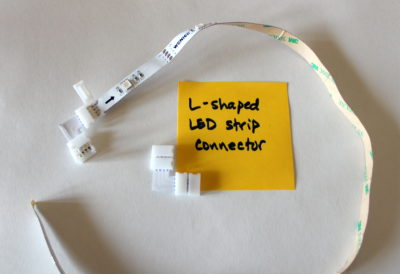
L-shaped LED strip connector allows for a 90 degree turn in the lights. If you are adding lights to the back of a TV you would use these on the corners.
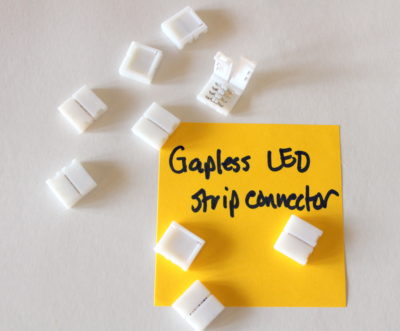
Gapless LED strip connectors are used to extend the lights without a gap. If you have a 16 foot strip of lights and you want to add a 3 foot strip of lights for a continuous look, one of these would do it.
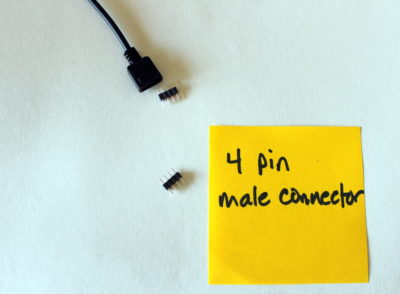
4 pin male connectors are used to connect two female plugs. In the photo, the black, female plug needs a 4 pin male connector to attach it to another black female plug. I prefer to call them innies and outties, but technical folks say female and male.
You are going to need to identify the following the know what you need to purchase:
- Power source.
- Length of lights.
- Do you want one remote or multiple remotes?
- How can you hide the lights, power cord, connectors, etc.?
Now the fun begins. I will use my project as an example.
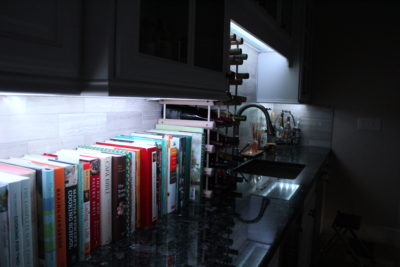
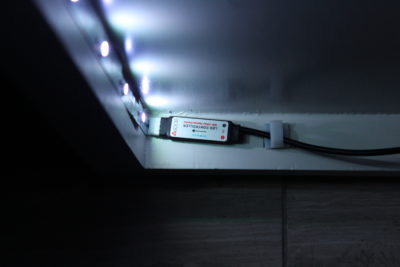
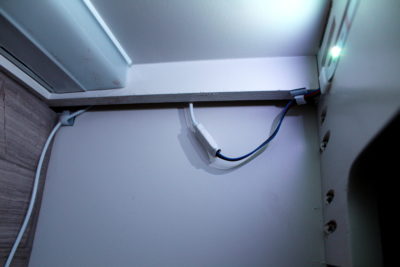
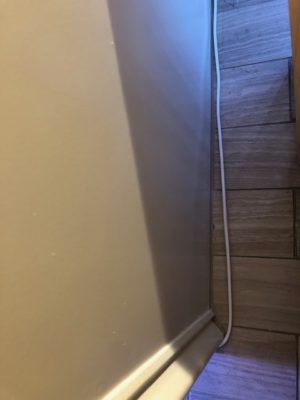
- The power source was near my coffee pot on the left side of the full wall of upper cabinets. In the fourth photo in the post, you can see the black power cord going to the plug behind the coffee pot.
- I had three lengths of lights and two lengths of connections that weren’t lit. The left cabinet needed 103″ strip of lights; then there was a 2 foot gap to allow the strip to travel up to the raised cabinets; then 68″ strip of lights were needed; then there was a second 2 feet gap to allow the strip to travel down to the lowered cabinets; and finally a 48″ set of lights were needed.
- I wanted one remote to control the full length of lights. This would allow for all sections to change in unison if I use a light changing program. I plan to Velcro the remote under the cabinet. I then won’t have to worry about it being lost. This way it will be out of sight, removable and secure.
- My cabinets had a 2 inch lip under which I could attach the lights. The cords could be secured under the cabinet with small white clips.
I used:
3 TV light strips 5050 SMD
2 white RBG extension cables
2 strip to RBG controller jumper
2 4 pin male connectors
Multiple plastic cord clips
1 remote
1 controller and power source
1 USB wall charger
White electrical tape
Here is how my light project was connected, starting from the wall plug:
USB wall charger;
Controller and power source;
Light strip, which already had a 4 pin connection on one end (103″ or as near as was allowed on the predetermined cut lines);
Strip to RBG controller jumper;
White RBG extension cable (3.3 feet was nearest length I found);
Light strip, which already had a 4 pin connection on one end (68″ or as near as was allowed on the predetermined cut lines);
Strip to RBG controller jumper;
White RBG extension cable (3.3 feet was nearest length I found); then
Light strip, which already had a 4 pin connection on one end (48″ or as near as was allowed on the predetermined cut lines)
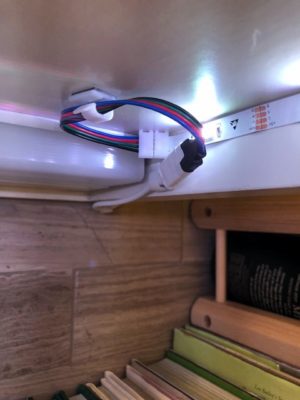
I used several of the white plastic cord clips to hide the lengths of jumpers. I used the white electrical tape to secure connections between the various components.
If you have a bad connection between jumpers, you may experience a rogue strip of lights that aren’t the same color as the other lights. Or at least that is my experience. My final small strip of lights was flickering between purple and blue while the other lights were white. I checked my connections and they are all white now!
It really is fun to put it together and use lighting as a form of decoration in (and out of) your house. The great thing is that the components aren’t very expensive, so you can play around to see what you like. Good luck with your project!
Great info! I recently got some of these for my desk area at work in a remodeling project. I love them! Now…to use at home. You helped tremendously. Blessings to you and Mike!
So good to hear from you, Qene’! Don’t you just love these lights? I had not thought of using them at the office, but I bet they are great for task lighting. Thanks for the idea! Kayla